


In this article, I will walk you through a step-by-step guide to making your first contribution to open source using a simple git workflow.
Contributing to open source may sound intimidating and complex at first, especially to a newbie or someone trying to get into the open source space for the first time. But it doesn't have to be, because you don’t have to understand the whole code structure or how every part of a project functions before you can contribute.
You can start with as little as fixing a typo in the docs or README file, And also just to correct a common misconception, you don’t have to be a programmer before you can contribute. You can contribute by writing articles, improving documentation, code structuring & review, Bug reports, open source advocacy, etc.
In one of my previous articles “Everything Open Source” I gave an extensive overview of open source, who can contribute to open source, non-code contributions, benefits of contributing to open source, you can check that out. A decent step-by-step git workflow required for contributing to open source is our focus in this article; this is not the only workflow available but it's widely used and accepted in the open source space.
Prerequisite
Basic knowledge or familiarity with Git is required, you can check out this link “Everyday Git” if you are not familiar with Git. Without further ado, let’s get started contributing.
Finding an Open Source Project
 |
| Image Credits - Photo by Yan Krukov from Pexels |
Finding an open source project to contribute to, can easily become a daunting task in contributing to open source but there are a few ways to work around it. Firstly, start by looking for open source projects that you are familiar with, let’s say software or tool you use frequently for example your favorite text editor if it is open sourced anyways. You can easily contribute to such projects.
You can also leverage Github direct search links to find repositories with beginner-friendly issues to get you started with contributing. Here are a few examples to get your feet wet. (source: freecodecamp)
- is:issue is:open label:beginner
- is:issue is:open label:easy
- is:issue is:open label:first-timers-only
- is:issue is:open label:good-first-bug
- is:issue is:open label:"good first issue"
If the first two methods do not feel like it for you, don’t worry I‘ve got you covered. You can check out this repository first-timers-lab I created to help newbies easily understand the git workflow I use for contributing and subsequently make their first contribution.
Having found a project to contribute to, you are ready to start contributing right? Not just yet, here are some initial suggestions that are worth looking out for, before proceeding to contribute.
README: A README is a markdown file that contains information about the software, code, project or it may also contain instructions on how to navigate the repository, or generally give an overview of the project.
Contributing guide: This markdown file provides you with a guide on how to contribute to the project; information such as a checklist for contribution, a prerequisite for submitting a pull request, how to add your changes to their documentation, style guide, naming conventions, etc.
Issue and Pull Request tab: Before submitting a new issue and subsequently a pull request, going over existing issues both closed and open can save you buckets of time because it helps you get an overview of activities on the repository. You might find that someone had raised the same or similar issue and the maintainer decided to go a different route probably because they have another plan. And also this step reveals the last time a pull request is merged or an issue closed. This eventually tells if a project is still being maintained or not, to avoid wasted efforts.
Submit an issue

One core part of the pull request process is submitting an issue. This is an essential step because it indicates your interest in working on the project, helps you understand the situation better by creating a context around it, and also provides a platform for discussion which can be linked to the pull request.
When submitting an issue, some repositories might have an issues template to guide you on the information needed when creating an issue. But in case they don’t, you are allowed to use your discretion. The title and description of the issue should be descriptive enough to convey the intent, whether it’s a feature request, bug fix, or a general question you should state that clearly at the beginning so maintainers know exactly what you want.
Remember to express your concerns reasonably when describing what you want, because sometimes when you sound offensive, you may not get buy-in for your idea even if what you are saying is correct. And finally, ask if a pull request makes sense before you start working on it.
Fork the project
 |
| Photo by Lisa Fotios from Pexels |
Forking the project is the next step in the contribution process, and it simply means making a copy of the project. And you do this by going to the repository main page on Github and clicking the Fork button located at the upper right corner of the page.

When the project is successfully forked, Github redirects you to a copy of the project living on your own GitHub account, where you can make changes and do whatever you want. Why can’t I make changes directly without having to copy the project? This is because you don’t have write access to the repository.
Clone the project
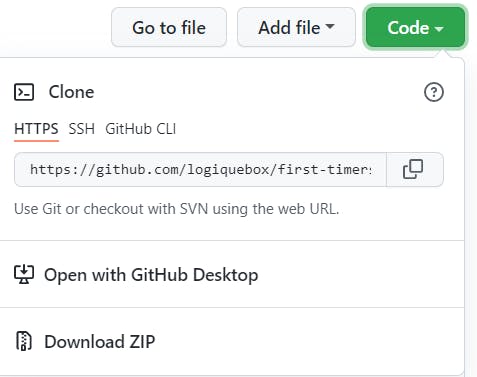
And this is done by going to the forked copy of the project on your Github account and clicking on the Code button and copying the HTTPS link, then heading onto your terminal and entering the following command.
$ git clone PASTE-COPIED-LINK
Be sure to replace all uppercase text with your details, in my case, it would like this
$ git clone https://github.com/logiquebox/first-timers-lab.git
After cloning successfully, open the project with your favorite text editor.
Create a branch
Before you start making changes, you should create a branch so that all your changes live on that branch. And this makes it so that every contributor works on a separate branch to avoid conflicts and only gets to push to master when their code is approved. Enter the following code in your terminal to create and move to a new branch, so you can make changes.
$ git checkout -b BRANCH-NAME
An example is;
$ git checkout -b my-contribution
Most repositories have a convention for naming branches, you can find this in the CONTRIBUTING guide, stick to the convention. What if there is no guide on branch naming? Use your discretion and be creative in naming your branch, make it short and descriptive.
Commit and Push Changes
After creating your branch and making your changes to the project. The next step is to commit and push your changes. Enter the command below to add changes to the staging area.
$ git add .
#Or
$ git add FILE-NAME
The $ git add . command adds all files changed to the staging area, while the $ git add FILE-NAME command specifies the files to be added to the staging area. You can choose to use either one it doesn't conflict.
Enter the next command to commit changes made to the repo locally.
$ git commit -m 'enter a commit message'
Be sure to always use descriptive and meaningful commit messages. The next command pushes the changes to remote
$ git push -u origin BRANCH-NAME
Create a Pull Request
Now, immediately after you push your changes to remote, Github will prompt you to make a pull request.

Click on the Compare & pull request button to make your pull request, then enter a title and description for the pull request. Most repositories usually have a template for submitting a pull request. If the repository doesn't have a pull request template then use your discretion.
In the description, ensure it conveys what the pull request does clearly and simply, then wait for your pull request to be merged.
And yes! Congratulations, You have just contributed to open source.
Conclusion
To recap, we have successfully covered a step-by-step process of contributing to open source using a simple git workflow. We looked at how to find open source projects to contribute to, submitting an issue, forking a project, cloning, branching, committing changes, and finally submitting a pull request.
Reference
How To Contribute To Open-Source Projects As A Beginner ~ Catalin Pit
How To Contribute to an Open Source Project ~ Sarah Drasner